DNS Records Setup
Add the required DNS records to your domain provider.
Written By ScaleFlows Team
Last updated 22 days ago
ℹ️ How it works: You will simply copy a few lines of text provided in your ScaleFlows dashboard and paste them into the settings of your domain provider (such as GoDaddy, Namecheap, or Cloudflare).
Video Guide
Text Guide
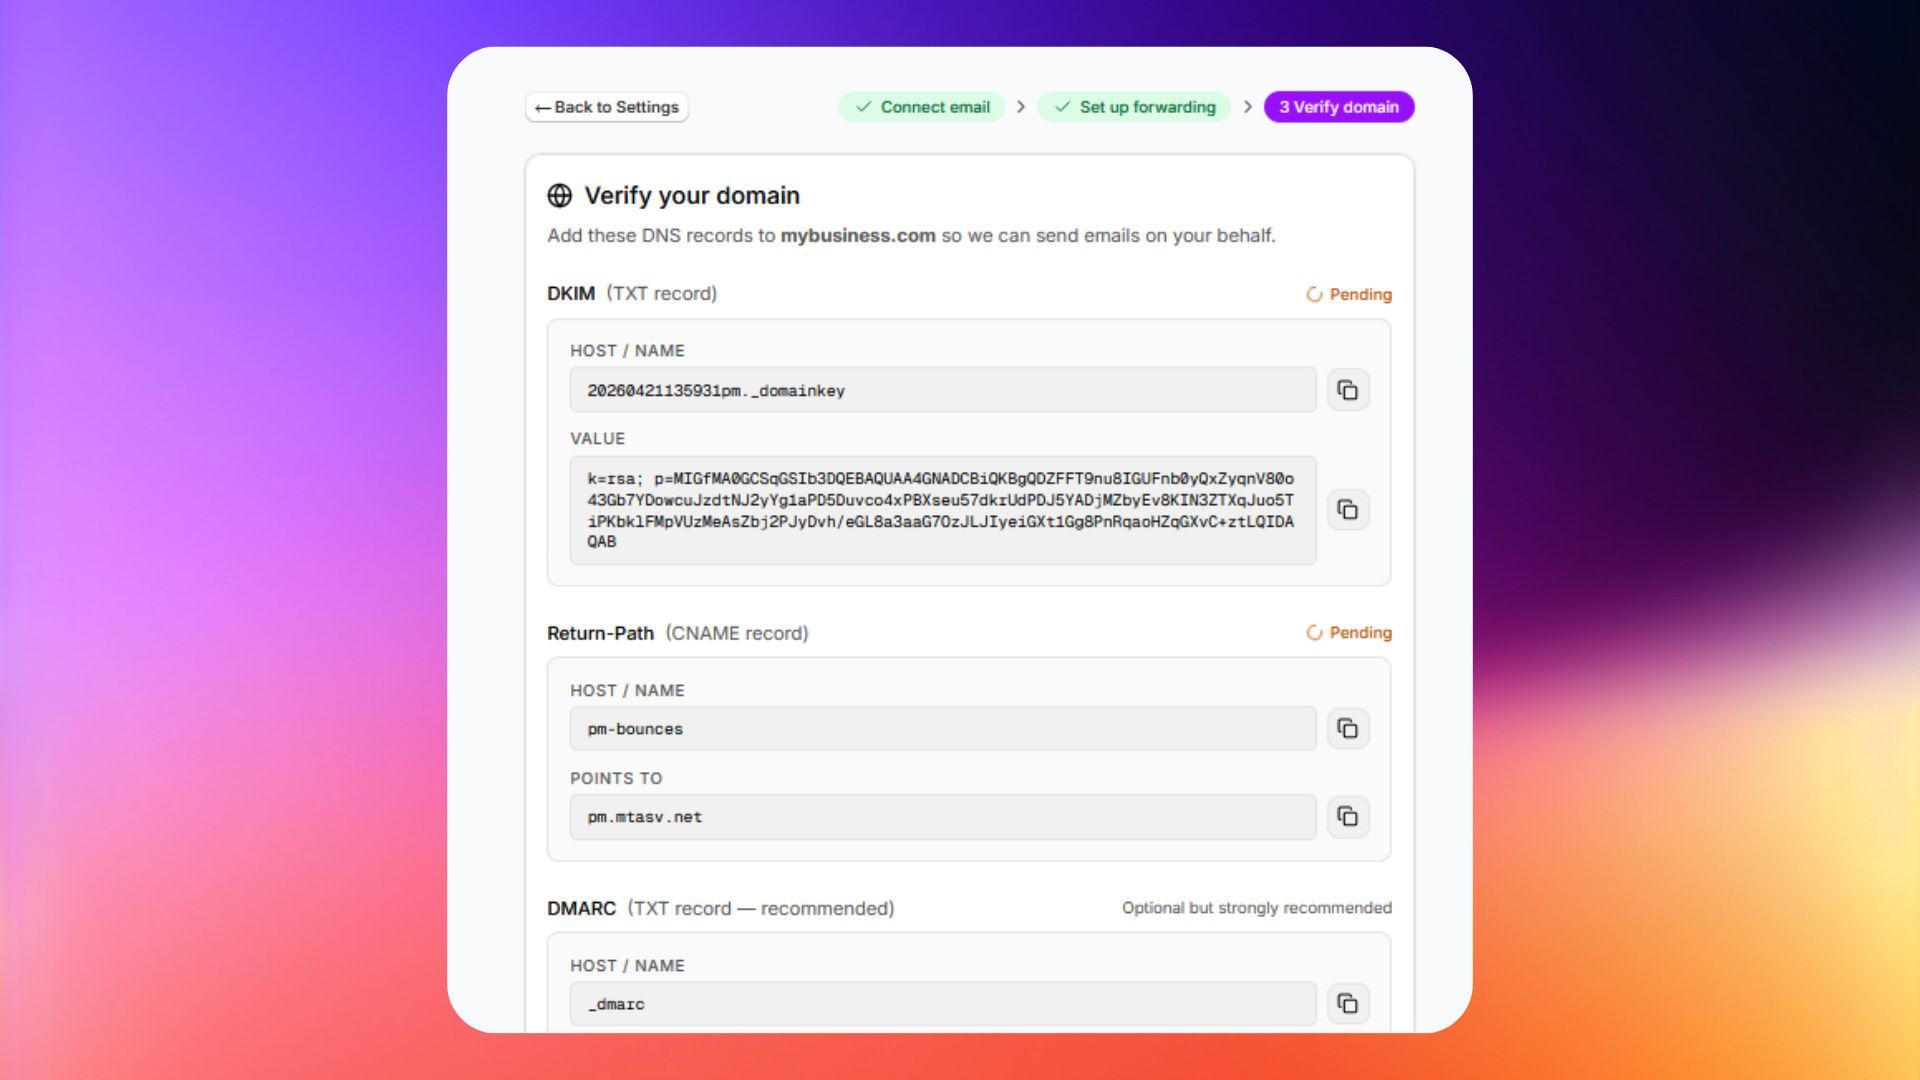
ℹ️ Info: You need to add records (CNAME and TXTs) to your domain provider (such as GoDaddy, Cloudflare, or Namecheap). This setup allows ScaleFlows to securely send and route emails on your behalf. While the exact dashboard looks different for every provider, the general steps are always the same.
Step 1. Log in to your domain registrar (where you purchased your domain name).
Step 2. Locate your DNS settings.
Step 3. Add the following:
- DKIM: Create a new TXT record. Paste the provided Host / Name and Value.
- Return-Path: Create a new CNAME record. Paste the provided Host / Name and the Points To value.
- DMARC: Create another TXT record. Paste the provided Host / Name and Value.
💡 Tip: In your ScaleFlows dashboard, use the copy buttons to accurately transfer the details for each required record into your domain's DNS settings.
Step 4. Save the new records in your domain provider's dashboard.
Step 5. Return to ScaleFlows and click the I've added the records - verify button to finalize your inbox connection.
ℹ️ Note: DNS changes usually update within a few minutes, but depending on your provider, it can occasionally take up to 48 hours to fully connect.
For more information on how to set up your DNS records, please check the following guides:
✅ Success: Once this is set up, ScaleFlows can send emails on your behalf.